
***********************/INTERUPT***********************
Anyway, the plan is that a pair of little great tits start their family in my birdhouse. And I will be on the front row. The birdhouse will be equiped with a night vision camera, a bunch of sensors and a scale to weigh the bird's nest. It is all connected to a Raspberry Pi and made visible on a web site. More will follow this autumn.
One of the features will be a couple of light gates that monitor the birds flying in and out. This setup can also be used for measuring the speed of an object passing each of the light gates. In the demo video you see I can shoot my finger with a speed of 7m/s. That is more then 25km/h or 15mph. I even managed to reach 11m/s once off-camera. So you now know that you can pick your nose and shoot the content with 40km/h (25mph)!
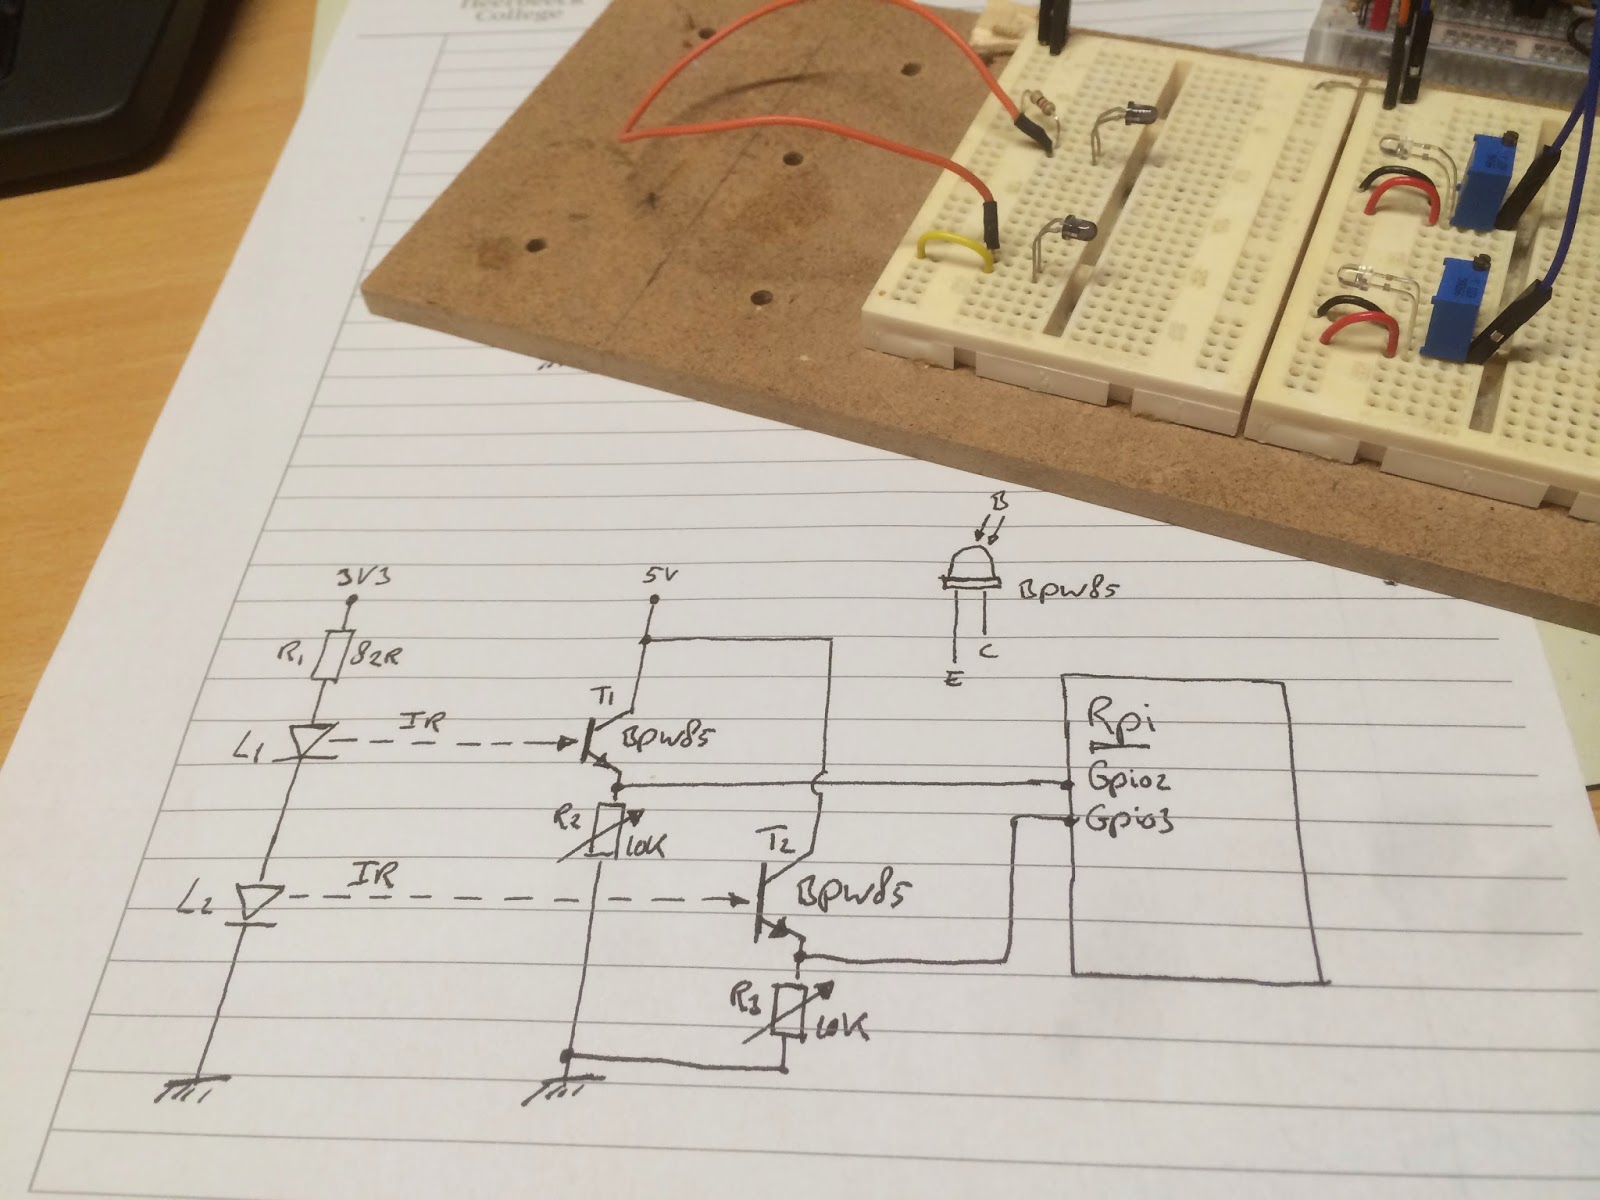
The picture below shows the schematics. It has two 3mm IR leds (I don't know the type numbers) that are powered by the 3V3 supply of the Raspberry Pi. The leds don't need to be very powerful because the IR receivers will only be 3cm away. These receivers are BPW85 NPN phototransistors that are sensitive to visible and IR light. The base voltage is dependent of the amount of light that it receives which allows current to flow from collector to emitter. I used a 10K variable resistor to be able to tune the voltage drop to a HIGH level of 3V3 that I can feed to the RPi. So, when the lightpath is blocked it outputs 0V, and 3V3 when the lightpath is not blocked. I found out that when I increased the distance between IR transmitter and receiver to over 4cm the light wasn't strong enough to reach a 3V3 voltage drop. If so, you have to increase the current through the leds or make a buffer (like a Darlington pair) to make it work.
The software is made in Python. The standard way of checking for inputs on the Rpi is with polling (if GPIO.input(x): blablabla). In my previous blog post I got a tip to use edge triggering, which is faster, more reliable and relieves the CPU. Basically the program is always sleeping, only when one of the GPIO inputs goes from a HIGH ('lightpath is unblocked') to a LOW ('lightpath is blocked') level a dedicated function is called. This feature is explained very thorough on Adafruit, but the code below shows the basic example how to use it.
The code waits for a falling edge on both GPIO inputs 2 and 3 (pins 13 and 15). If one the two is triggered, it checks if the other input was already triggered. If this is the case it calculates the time difference in microseconds for a precise measurement. The distance between the light gates is 3cm, which is needed to calculate the speed.
For the upcoming birdhouse application it also checks if the bird entered or left the birdhouse, but for the booger shooter application I suggest you always shoot in one direction, that is AWAY from you.
The code can be found here (link):